- All
- Product Name
- Product Keyword
- Product Model
- Product Summary
- Product Description
- Multi Field Search
Views: 23 Author: Site Editor Publish Time: 2018-09-01 Origin: Site
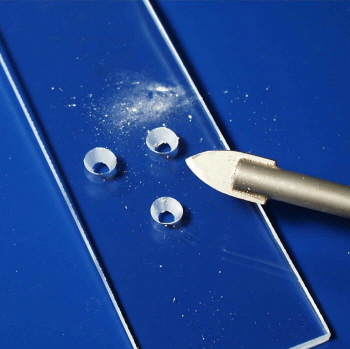
Whether you are making changes to an existing glass-tiled area or starting a new installation project, it may be necessary to drill holes through the glass tiles to accommodate new fixtures or pipes. Although this may sound difficult, the process can be completed if you are willing to patiently work on the project.

Installed Tile
1. Tear off two pieces of masking tape and adhere the pieces to the surface of the tile in an "X" pattern over the area where you plan to drill a hole. This helps to keep the drill bit from wandering off the mark when drilling. Make a reference mark where you want to drill.
2. Attach the correct size diamond-encrusted carbide bit to your drill. If you plan to anchor a fixture to the tile, use a bit that is 1/8-inch larger than the anchoring screws. This extra space will prevent stress from being transferred from the fixture through the anchor and to the glass tile.
3. Position the tip of the drill bit over the mark. Drill at a slow speed with constant pressure. Keep the drill bit perpendicular to the tile to avoid chipping. Occasionally spray a mist of water around the drill bit to keep it lubricated. Drill to the desired depth.
Uninstalled Tile
1. Mark back of the glass tile where you plan to drill a hole. Place the tile on a scrap piece of MDF board with the backside facing up. Align the drill bit with the reference mark and drill a small pilot hole. Flip the tile over.
2. Take a ball of plumber's putty and knead it into a 1/2-inch-diameter, 10-inch long roll. Join the ends of the putty to make a circle and place it around the area where you will be drilling. Press the circle of putty onto the tile to form a seal. This acts as a temporary dam to hold water while you are drilling. Fill the circle with water.
3. Align the tip of the drill bit with pilot hole and hold the drill perpendicular to the tile. Using a slow speed, gently apply constant pressure. Work at a slow pace and continue drilling until you have gone through the tile.
§ Masking tape
§ Permanent marker
§ Drill
§ Diamond-encrusted carbide bit
§ Spray bottle with water
§ Scrap piece of MDF board (medium density fiberboard)
§ Plumber's putty
§ To drill larger holes to accommodate pipes, use a diamond coring bit.
§ Protect your eyes with safety glasses.